Collecting Evidence with Azure Blob Storage
Send event artifacts to a blob container in your own Azure storage account. Keep Aware authenticates with a Microsoft Entra application that you consent to and grant access to your container, so no account keys or long-lived SAS tokens are ever shared or stored.
Requirements
- Access to the Keep Aware Console: Ensure valid login credentials are available and logged in to the console.
- Azure Blob Storage container: A storage account and blob container to store evidence artifacts.
- Azure administrator access: An account that can grant admin consent in Microsoft Entra ID and assign roles on the storage account, such as a Global Administrator paired with an Owner or User Access Administrator on the storage account.
Getting started
Keep Aware publishes a multi-tenant Microsoft Entra application. Setup happens in three parts:
- Consent: You grant admin consent, which adds the Keep Aware evidence application to your directory as an enterprise application. Consent alone grants no access to your data.
- Access: You assign the application two Azure roles that scope it to a single container.
- Upload: When evidence is collected, Keep Aware uses the application to request a short-lived, per-file user-delegation signature and writes each artifact directly to your container.
Because access is granted through Azure role assignments, you can revoke it at any time by removing the role assignments.
Setting up the integration
To get started, navigate to the Integrations Page and select the Evidence Collection integration. This will open a modal. Then select Create New Integration and begin configuring the integration.
 Image: Integrations Page
Configuring the integration
Configure each of the fields below:
- Name: A name for the integration.
- Directory (tenant) ID: The ID of the Microsoft Entra directory that owns the storage account. Find it in the Azure portal under Microsoft Entra ID on the Overview page.
- Storage account name: Name of the Azure storage account where evidence will be stored.
- Container name: Name of the blob container where evidence will be stored.
- Capture screenshot: Whether page screenshot artifacts will be captured and saved in the container.
- Capture inputs: Whether input artifacts will be captured and saved in the container.
- Capture uploads: Whether uploaded file artifacts will be captured and saved in the container.
- Capture DOM: Whether the page's HTML DOM will be captured and saved in the container.
When you save the integration, Keep Aware redirects you to Microsoft to grant admin consent.
Granting admin consent
After you save the integration, Keep Aware sends you to the Microsoft sign-in page to consent to the Keep Aware evidence application.
- Sign in with an account that can grant admin consent for your directory.
- Review the permissions and select Accept.
Microsoft returns you to the console. Consent installs the Keep Aware evidence application in your directory as an enterprise application but does not grant access to any data yet. You assign that access in the next step.
Assigning access to your container
Grant the Keep Aware evidence application two roles in the Azure portal. Both role assignments are required: the first lets Keep Aware request upload signatures, and the second lets it write and read evidence in your container.
- Storage Blob Delegator on the storage account: Lets Keep Aware request the short-lived user-delegation keys used to sign uploads. It grants no access to blob data on its own.
- Storage Blob Data Contributor on the container: Lets Keep Aware write evidence to the container and read it back so artifacts appear in the console.
To assign each role:
- In the Azure portal, open the storage account, then select Access Control (IAM) to assign the account-scoped role. To scope the data role to a single container, open the container first and select its Access Control (IAM) instead.
- Select Add, then Add role assignment.
- Select the role, then select Next.
- Under Members, choose User, group, or service principal and search for the Keep Aware evidence application by name.
- Select Review + assign to save the assignment.
Repeat for the second role. Role assignments can take a few minutes to take effect.
Collecting evidence in a policy
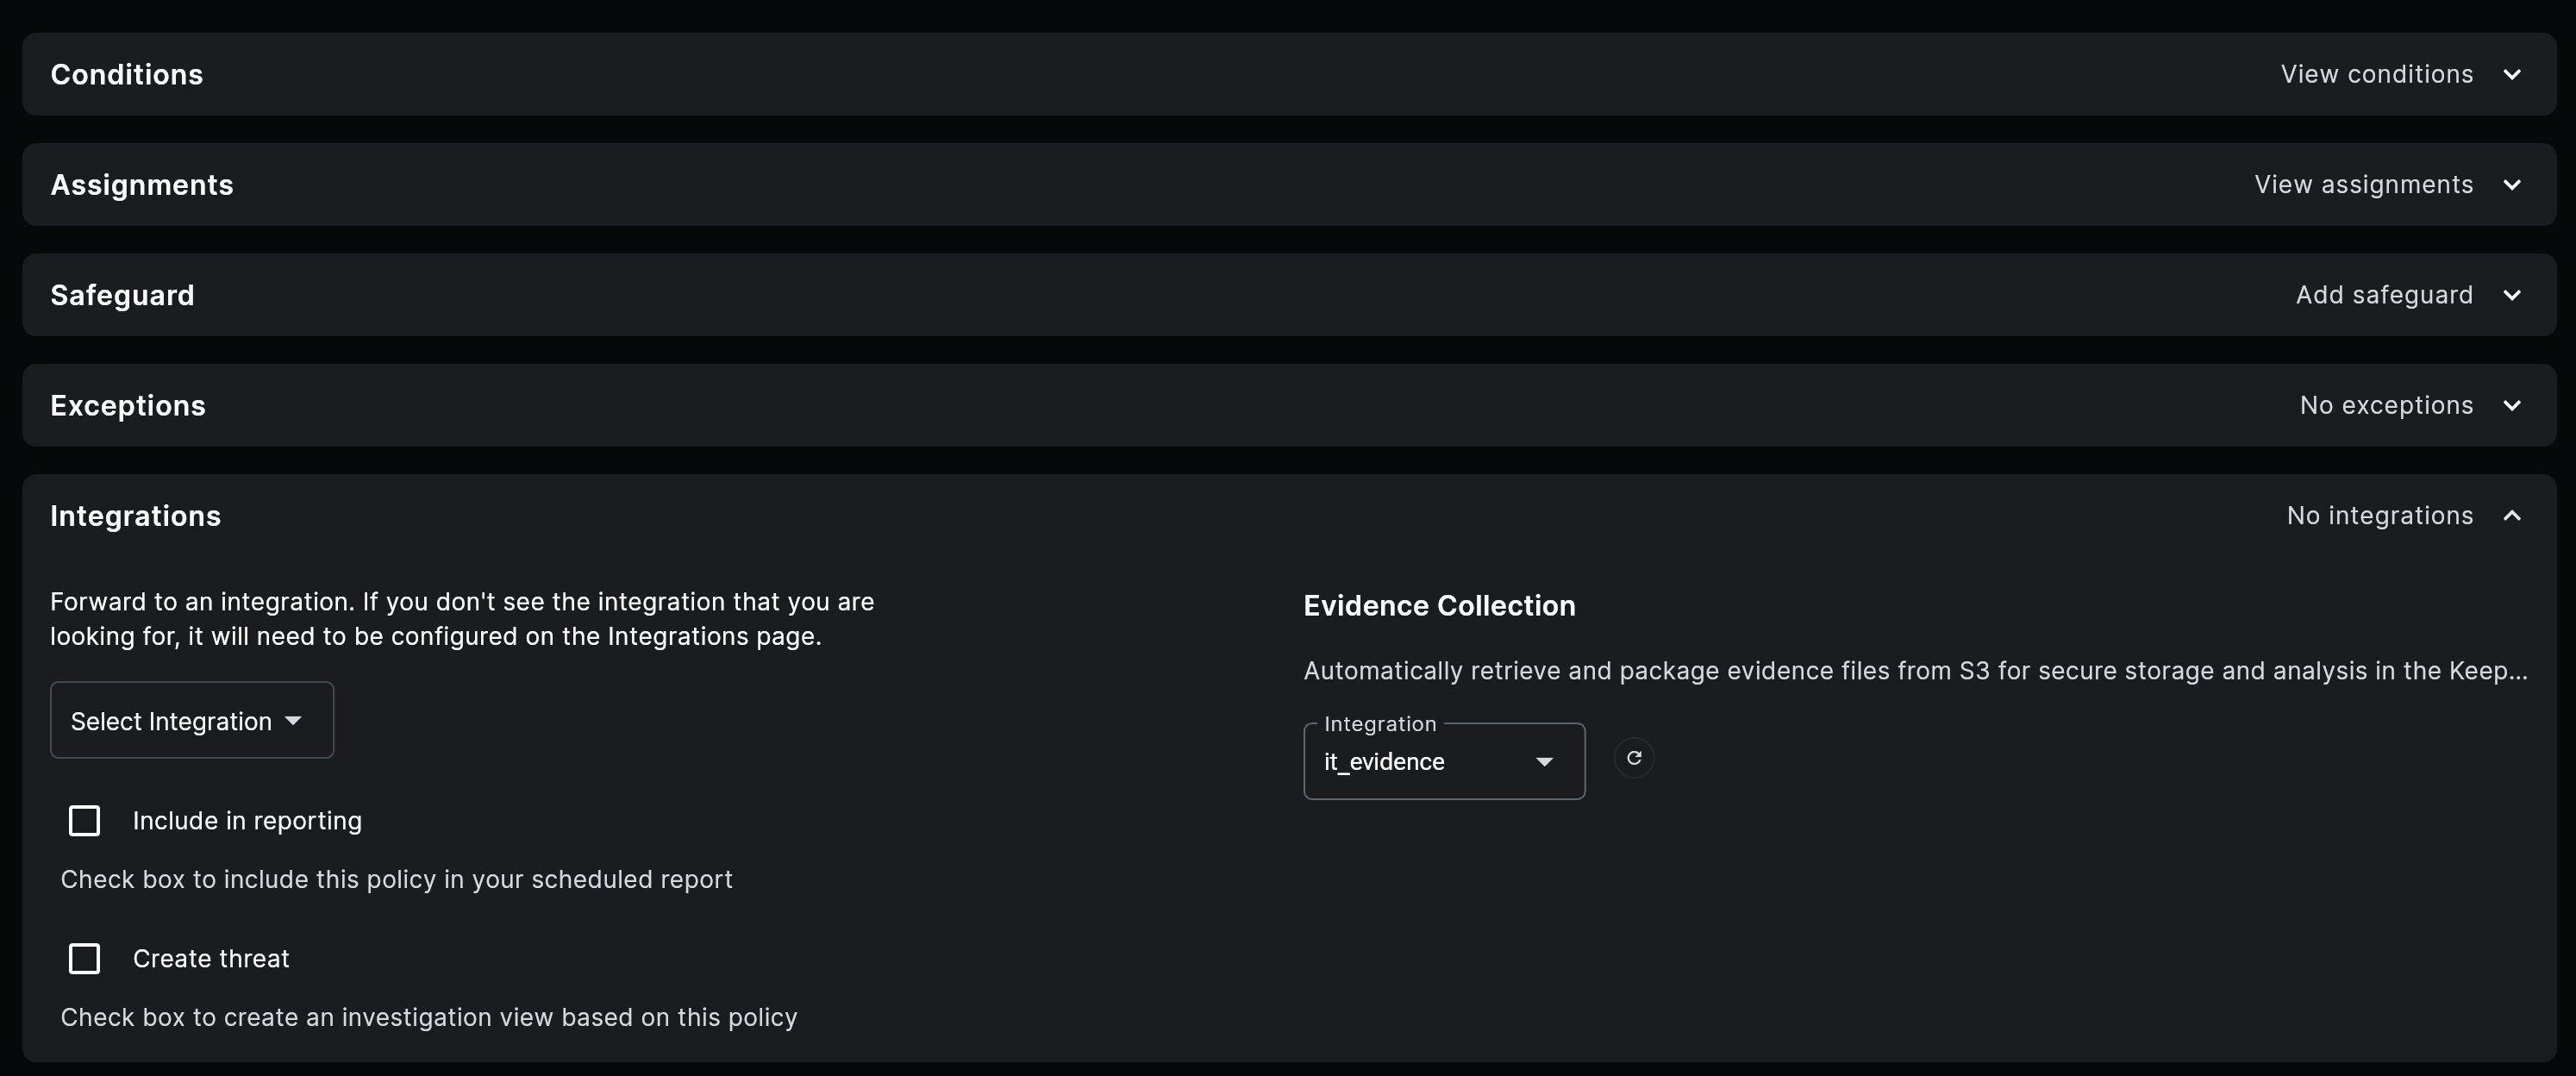
To enable evidence collection navigate to the Integrations in the policy editor and select which integration should be used under Evidence Collection.
Results
When evidence is collected from an event, artifacts are stored in Azure Blob Storage with the following structure:
container-name/
└── {browser_id}/
    └── {event_id}/
        ├── input.txt
        ├── screenshot.png
        ├── pageSource.html
        └── uploads/
            └── {uploaded_file_name}
Each event captured is organized by the unique ID for the browser, then by the event ID. Evidence artifacts such as inputs, screenshots, and DOM captures are stored within the event folder. Captured file uploads are stored under an uploads/ subfolder, keyed by their original filename. Keep Aware reads these artifacts back through the same role assignment, so evidence downloads directly in the console with no extra configuration.